Ultimate Introduction to Roblox Studio! 🚀
New to Roblox Studio? Learn the basics, cool tricks, and how to use the toolbox to start your developing journey!
Introduction
Welcome to the ultimate beginner's guide to Roblox Studio! If you've ever dreamed of creating your own games and sharing them with millions of players, you're in the right place. Roblox Studio is a powerful, free tool that lets you build anything you can imagine, from epic obby to cozy hangouts. This guide will cover all the essential concepts and skills you need to start building on Roblox Studio.
We'll explore everything in a clear, step-by-step way, so you can learn at your own pace and start creating right away. No prior experience is necessary – just bring your creativity and a willingness to learn!
Here's a sneak peek at what we'll be covering:
- What is Roblox Studio? A friendly introduction to the software and its capabilities.
- Navigating Roblox Studio: Mastering the interface, including moving around the 3D viewport and understanding key panels.
- Essential Tools & Top Bar: Learning about tools like select, move, rotate, scale, and how to use the top bar effectively.
- Explorer & Properties: Diving deep into the Explorer and Properties windows to manage and customize your game objects.
- Tips and Tricks: Pro tips to boost your workflow and build more efficiently.
- Unleashing the Power of the Toolbox: Discovering the vast library of free models, assets, and scripts available in the Toolbox, and how to leverage them in your projects.
- The Output Window: Understanding the importance of output window for debugging and real time script result/errors.
What is Roblox Studio?
Roblox Studio is the free and official game development software provided by Roblox, and it's your gateway to creating anything from simple games to complex, interactive worlds on the Roblox platform. Think of it as a LEGO set combined with a coding environment – you can build with blocks and add functionality with code!
Here's a breakdown of what makes Roblox Studio so powerful:
- All-in-One Development Environment: It provides all the tools you need in one place, from building and designing to scripting and testing.
- Visual Building Tools: Create your world using a variety of pre-made shapes (like cubes, spheres, and cylinders) and more complex models. You can easily resize, reshape, and arrange these objects to build anything you can imagine.
- Luau Scripting: Add interactivity and dynamic behavior to your creations using Luau, Roblox's programming language (a dialect of Lua). This allows you to create game mechanics, character movement, user interfaces, and much more. Don't worry if you're new to coding – we'll cover the basics!
- Vast Asset Library (Toolbox): Access a huge library of free models, scripts, images, and audio created by Roblox and the community. This can save you tons of time and effort in your development process.
- Collaboration Features: Work together with friends or other developers on the same project in real-time. This is great for teamwork and learning from others.
- Easy Publishing: Once you're happy with your creation, you can easily publish it to the Roblox platform, where millions of players can experience it. Roblox hosts the servers for you, so you don't have to worry about that.
How to Use Studio?
Alright, let's get our hands dirty and start exploring how to actually use Roblox Studio!
When you first open Roblox Studio you'll see this page. Displaying your recent experiences, templates and so on...
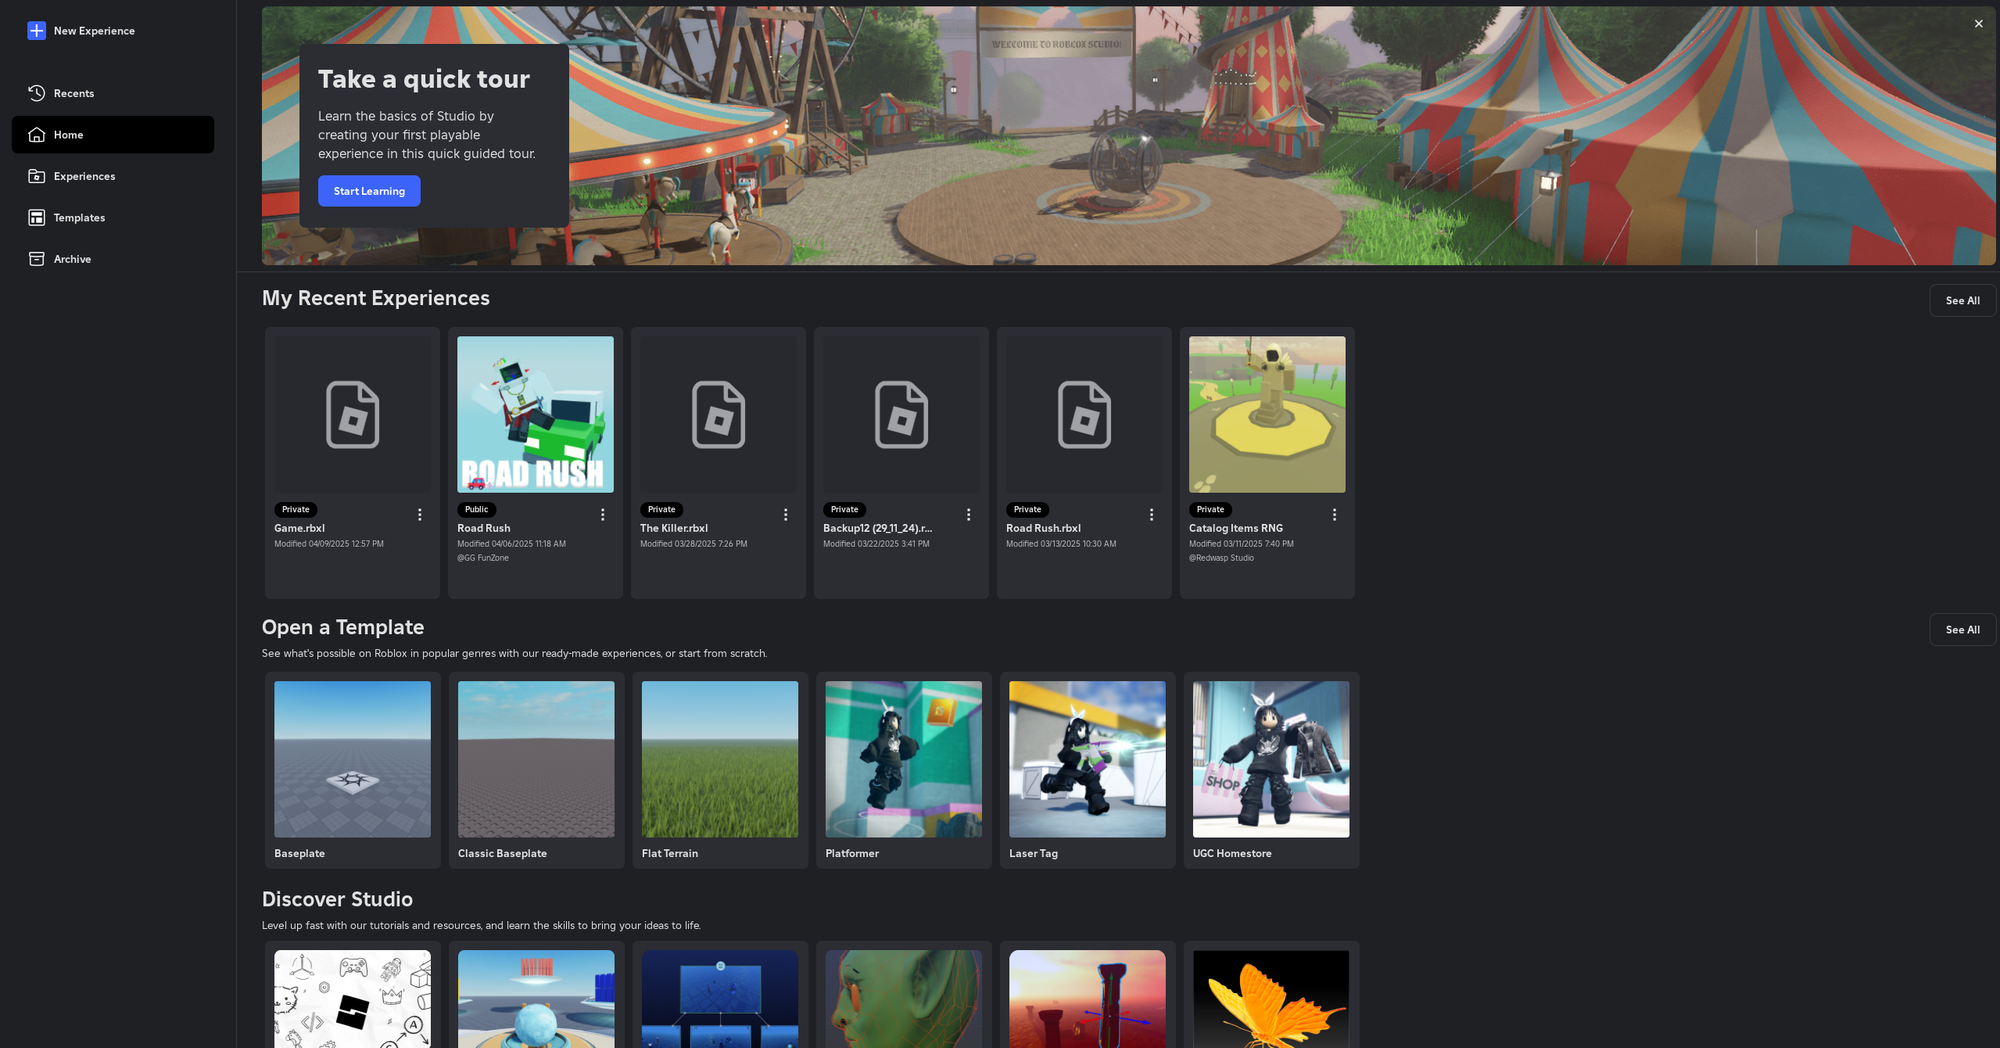
To create a new experience, you can select one template from following options:

The most used one is the Baseplate, but I recommend exploring the pre build ones, especially when you're just trying out Roblox studio for the first time.
Navigating the 3D Viewport
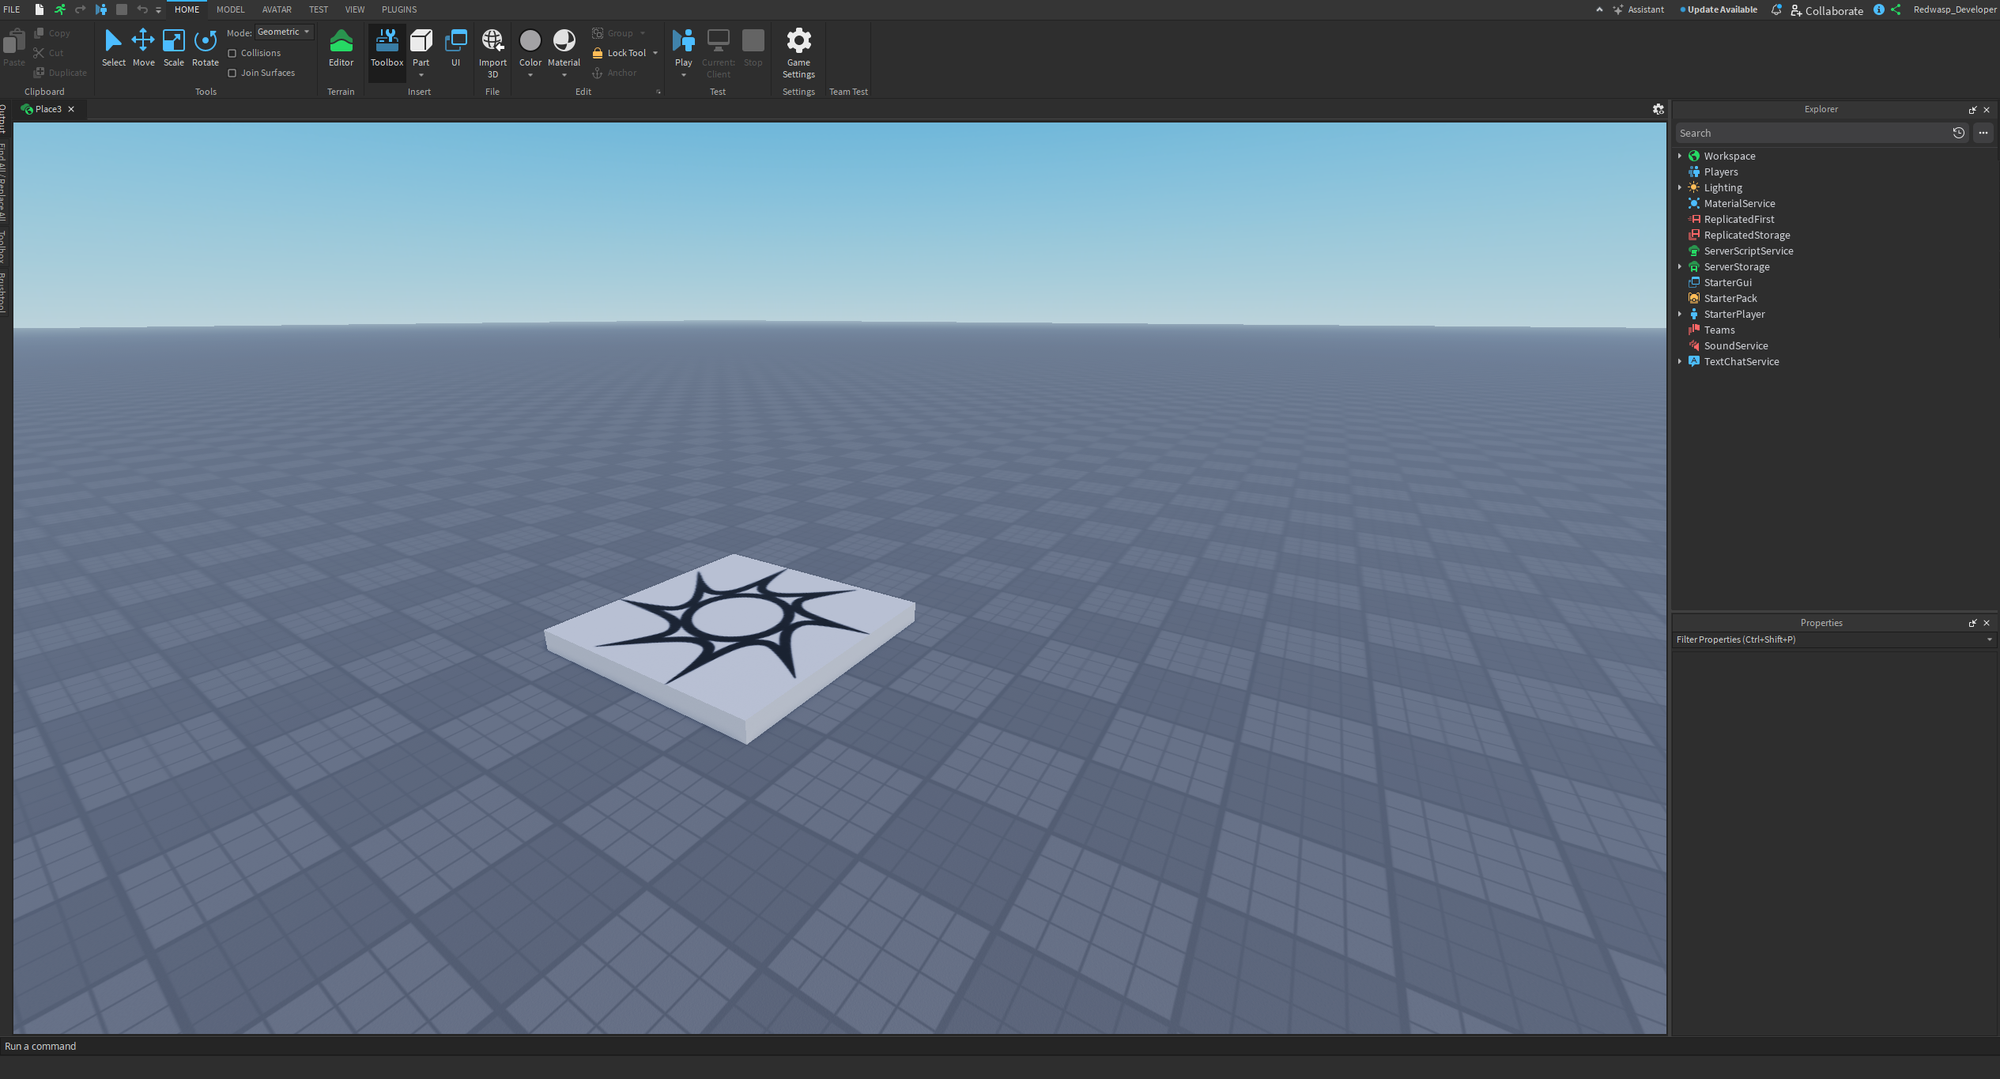
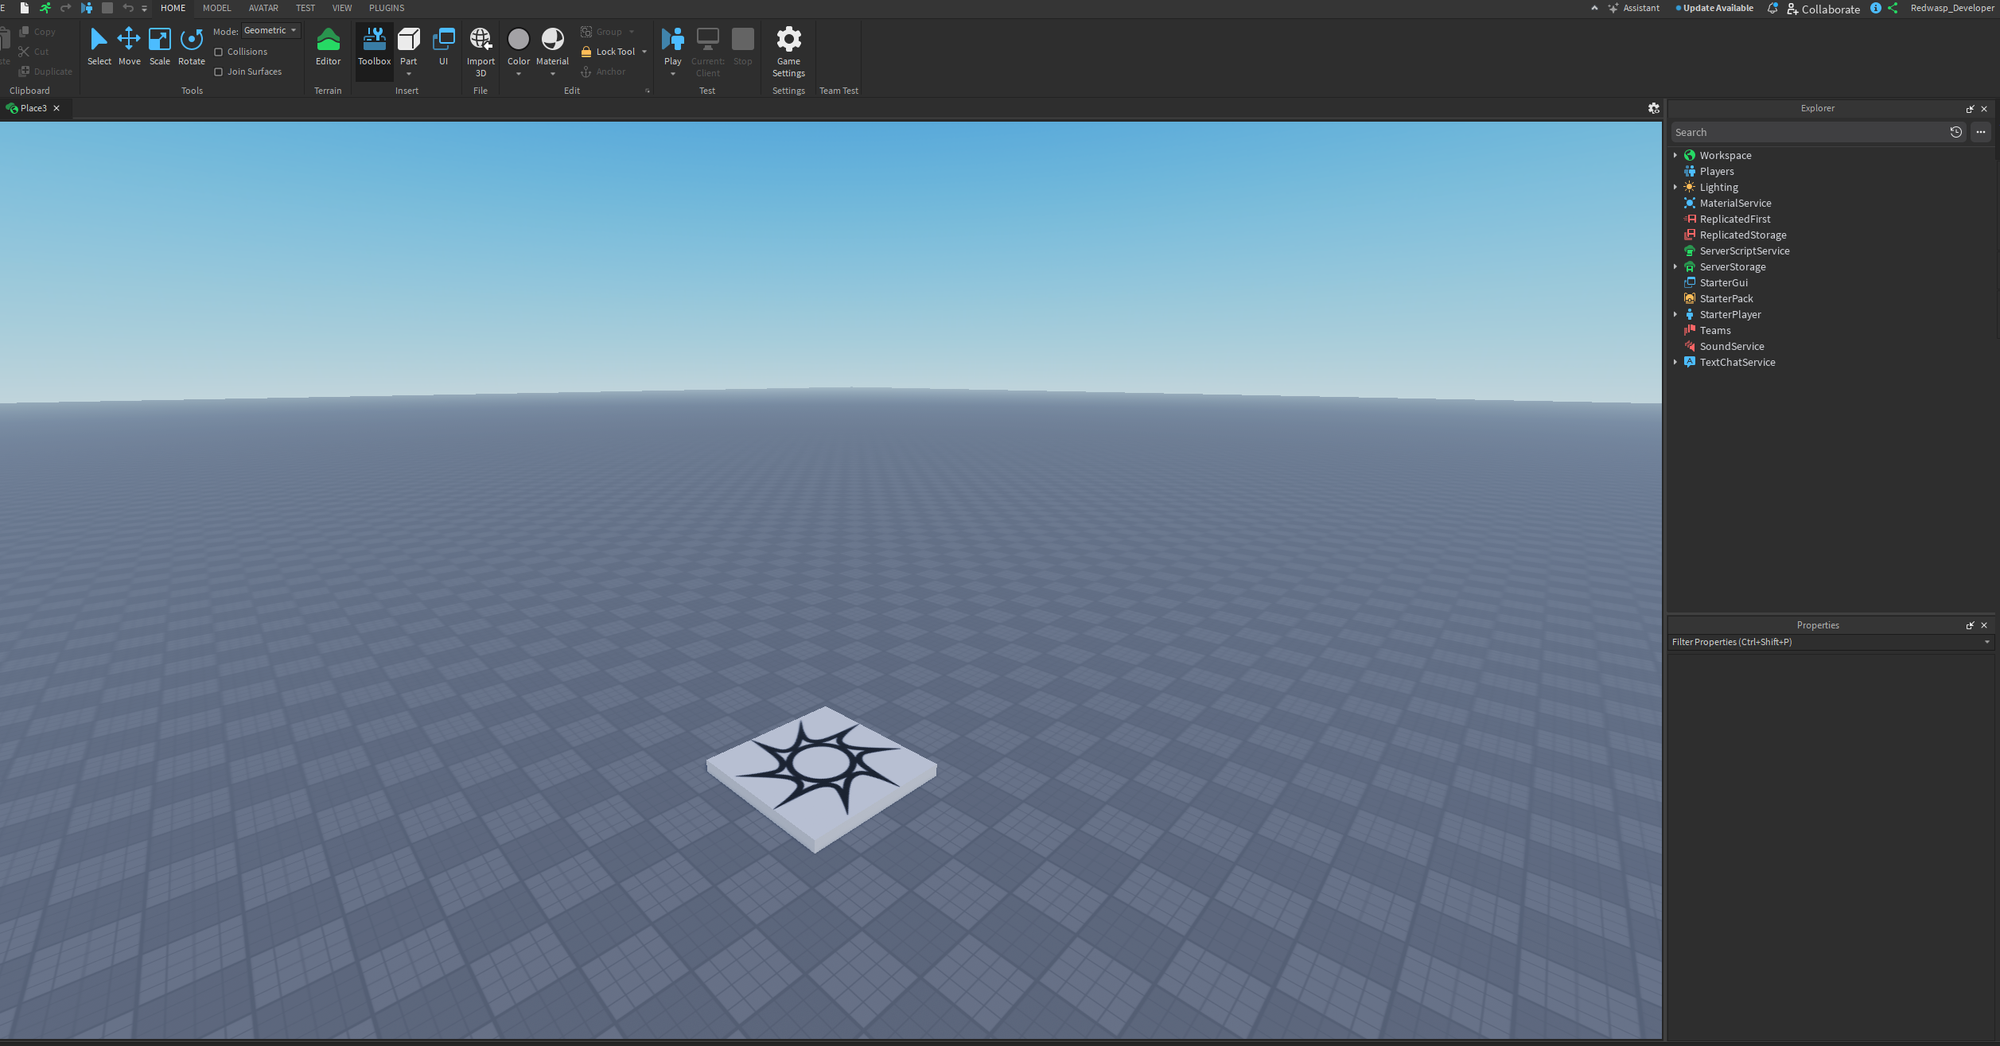
Once you open a "place", you will see something similar to this:
or even something like this:
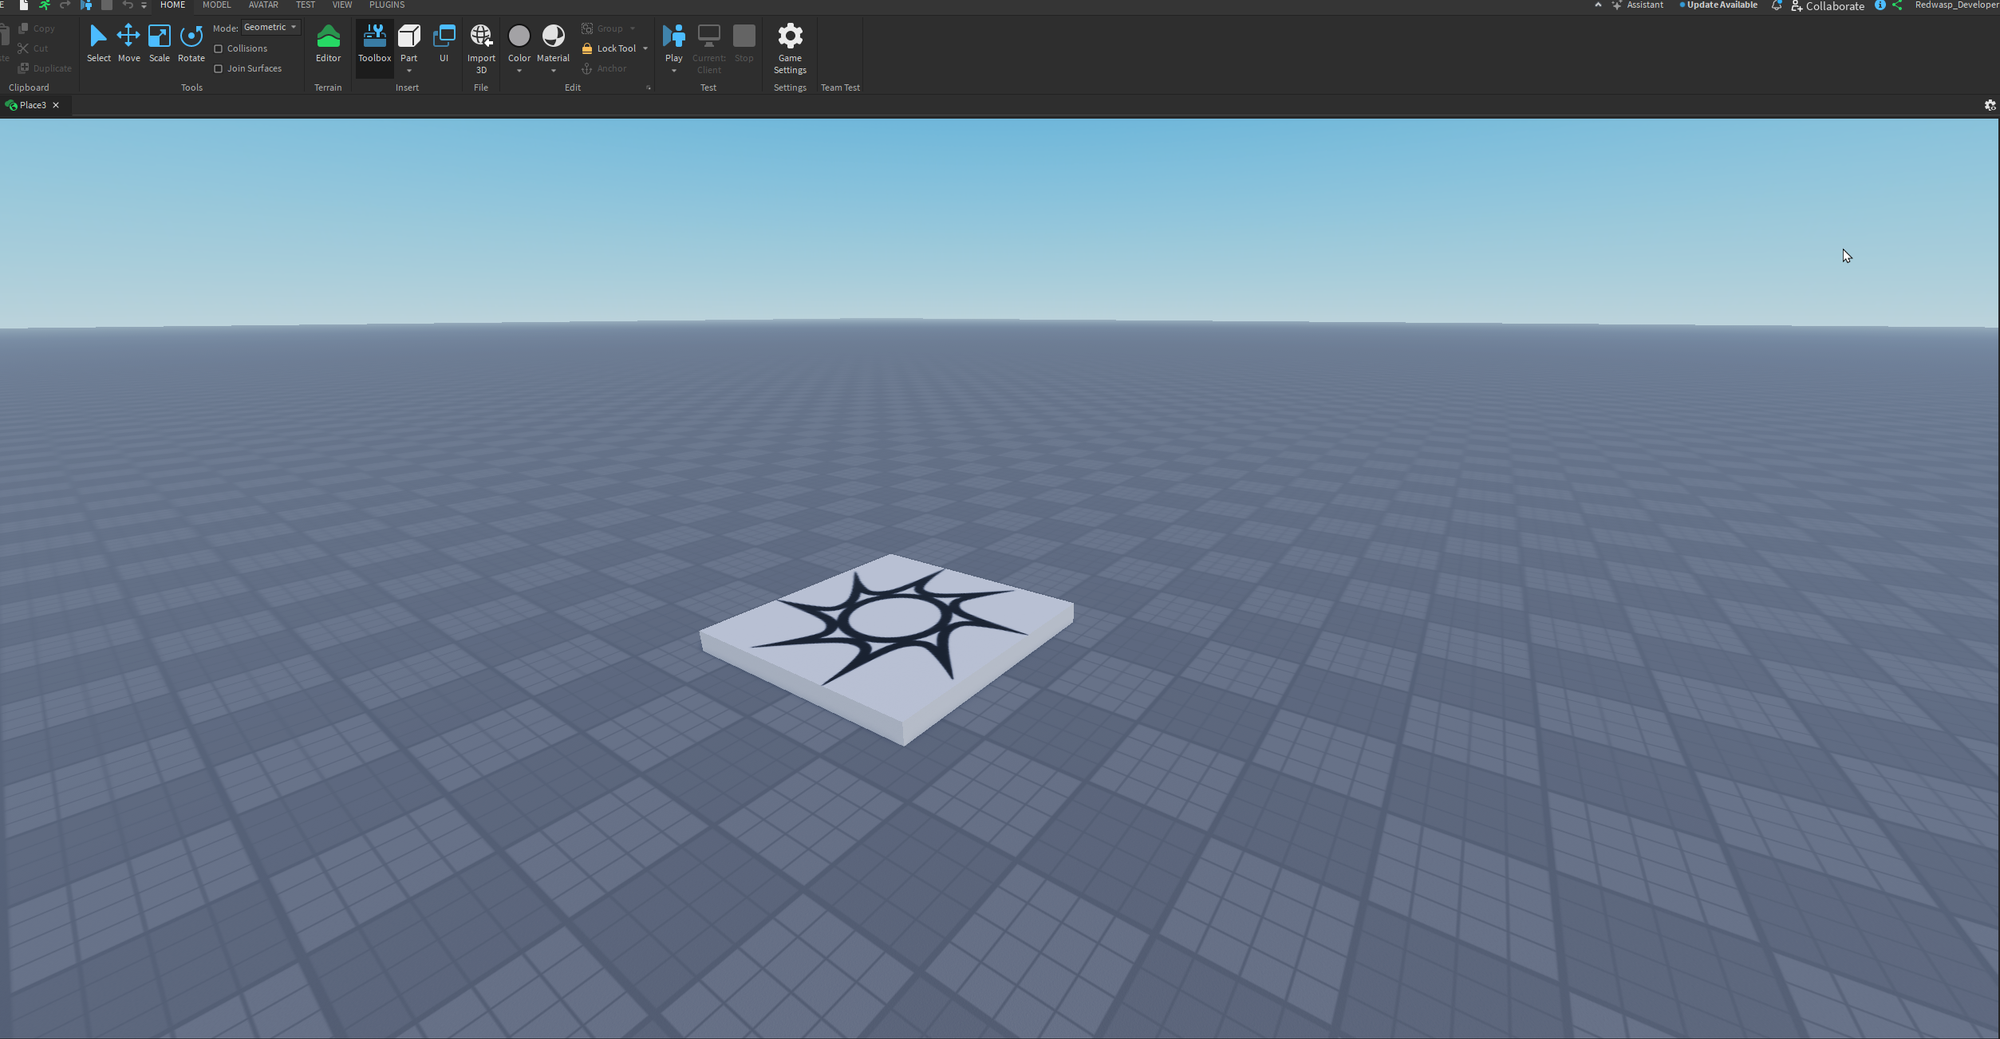
The main screen shows you the 3D viewport of the game and the top bar contains all essentials. Now you probably wanna know how to move? Here's a breakdown of the essential controls:
- Orbit (Rotate): Hold down the right mouse button and drag. This allows you to rotate the camera around a central point, giving you different perspectives on your scene.
- Pan (Move): Hold down the middle mouse button (or scroll wheel) and drag. This lets you move the camera horizontally and vertically without changing the viewing angle.
- Zoom: Use the scroll wheel to zoom in and out. Get up close for detailed work or zoom out for a broader view.
- WASD Keys: Use the
W,A,S, andDkeys to move the camera forward, left, backward, and right, respectively, just like in many games! You can holdSHIFTwhile moving to decrease the moving speed.
- Q & E Keys: Use the
QandEkeys to move the camera up and down. This is helpful for adjusting your vertical position.
Understanding the Core Panels: Explorer & Properties
The Explorer and Properties panels are the first thing you need to enable if not yet done. They're essential for managing and customizing the objects in your game.
To enable them go to: View tab:

and select Explorer and Properties:

You should see side two tabs appear on your right like this:
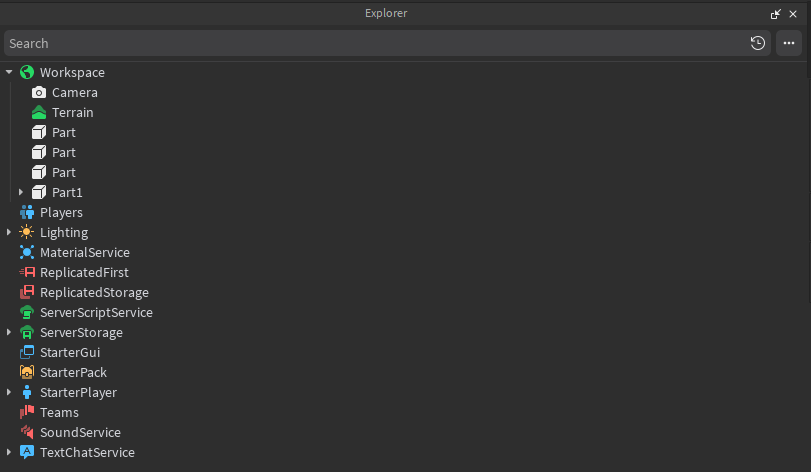
- Explorer: This panel (usually located on the right side of the screen) displays a hierarchical view of all the objects in your game. Think of it as a table of contents or an outline.
- You can use the Explorer to:
- Find Objects: Quickly locate specific parts, models, scripts, or other elements in your game.
- Organize Your Game: Group related objects into folders or models to keep your workspace tidy.
- Rename Objects: Give objects descriptive names to make them easier to identify (e.g., "RedWall" instead of "Part1").
- Parenting: Create parent-child relationships between objects. For example, you might group all the parts of a car model under a single "Car" model object.
- You can use the Explorer to:
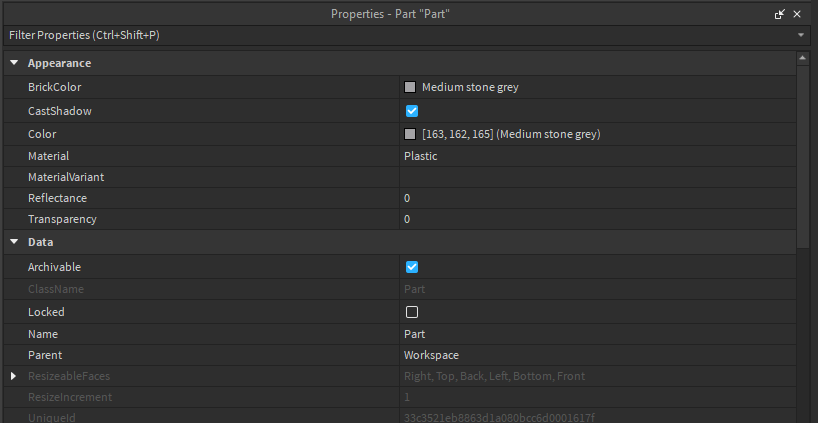
- Properties: This panel (usually located below the Explorer) allows you to modify the attributes of any object you select.
- When you select an object (either in the 3D Viewport or in the Explorer), its properties will be displayed in the Properties panel.
- You can use the Properties panel to:
- Change Appearance: Modify the color, material, and transparency of objects.
- Adjust Size and Position: Precisely control the size, position, and orientation of objects.
- Configure Behavior: Set properties that affect how an object behaves, such as whether it's collidable, anchored (fixed in place), etc.
Let's say you want to change the color of a brick: Select the brick (either directly within the 3D viewport or in Explorer tab), go to the Properties panel, find the "Color" property, and choose a new color from the color picker. Simple as that!
Top Bar Tools: Your Building Arsenal
The top bar in Roblox Studio is packed with essential tools for building and editing. Here's a rundown of the most important ones:
- Select: The default tool. Use it to select objects in the 3D Viewport or the Explorer.

- Move: Drag selected objects along the X, Y, and Z axes to reposition them.

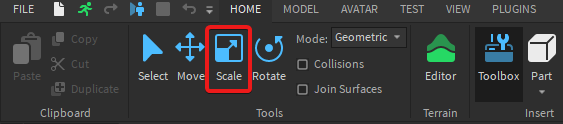
- Scale: Resize selected objects. You can scale uniformly (maintaining proportions) or non-uniformly (stretching along specific axes).
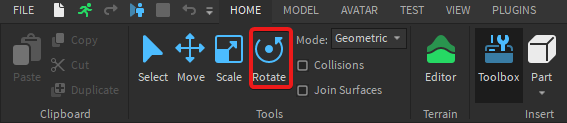
- Rotate: Rotate selected objects around the X, Y, and Z axes. This is useful for angling parts or creating angled structures.
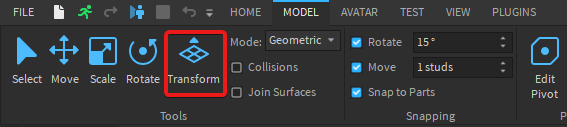
- Transform: A versatile tool that combines the Move, Rotate, and Scale functions into a single interface. This can be a more efficient way to manipulate objects. (Found only in Model tab)
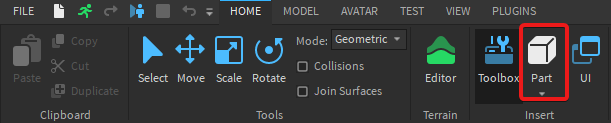
- Part: Add a new "part" which is a basic 3D rectangle shape. To select different shapes, click on the small arrow pointing downwards below the "part" icon.
- Anchor: Anchors the selected part, so it stays fixed in place. If disabled, the part will have physics applied and will be able to move by players.

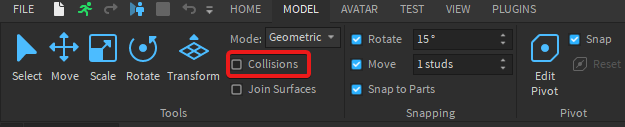
- Collisions: Toggles whether parts will collide with each other as you move them. Turn this off to move parts through each other.
- Join Surfaces: Creates a "weld" between parts touching each others so they stay connected and can't be separated, even when they're not anchored.

- Union: Combines two or more parts into a single, complex shape.

- Negate: Converts a part into a "negative" part, which can be used to cut away sections of other parts (when combined with the Union tool).

- Separate: Dismantles two or more parts into their initial state.

- Color & Material: Quickly access the Color and Material properties of selected parts, without needing to find them in the Properties panel.

Experiment with these tools! Try creating a simple structure using different parts, moving them around, rotating them, and scaling them. The more you practice, the more comfortable you'll become with the Roblox Studio interface and building tools.
Tips and Tricks
Ready to level up your Roblox Studio skills? Here are some handy tips and tricks to improve your workflow, build more efficiently, and create better games!
Organization is Key
Keeping your workspace organized is crucial, especially as your projects grow in complexity.
- Use Folders and Models: Group related parts, scripts, and other objects into Folders and Models in the Explorer panel. This makes it easier to find and manage your assets.
- To create a folder, right-click in the Explorer panel and select "Insert Object" > "Folder."
- To create a model, right-click in the Explorer panel and select "Insert Object" > "Model."
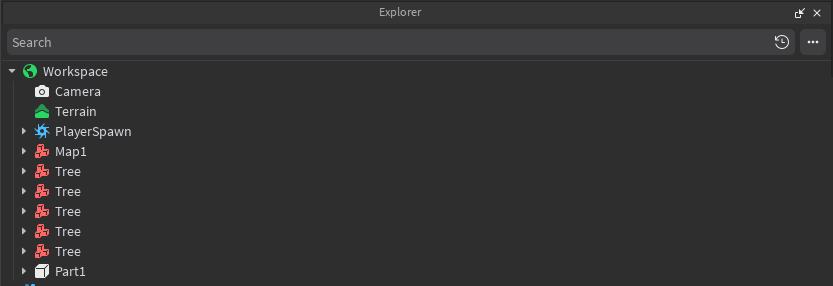
- Descriptive Naming: Give your objects meaningful names. Instead of "Part1," name it "Tree" or "PlayerSpawn." This will save you a lot of time when searching for specific items.
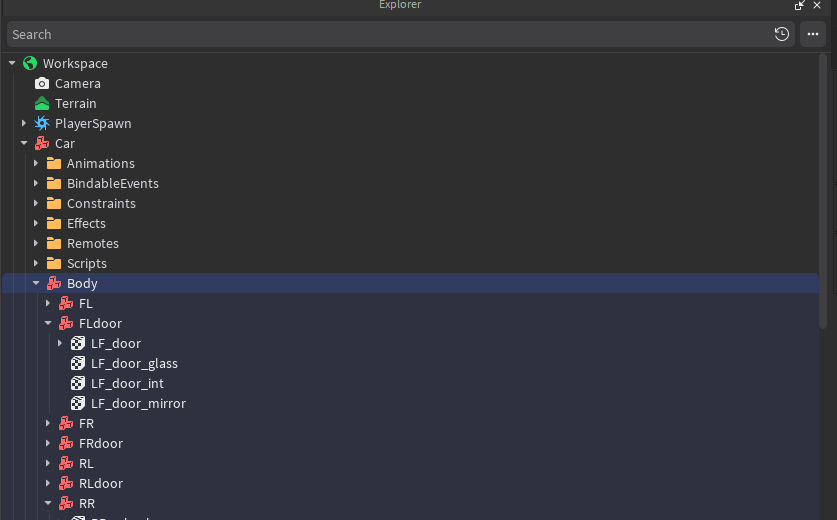
- Hierarchical Structure: Use parenting to create clear hierarchies. For example, group all the parts of a Car under a "Body" model. Then you can move, rotate, and scale the entire car as a single unit.
Building Shortcuts
Efficiency is key! These shortcuts will help you build faster:
- Ctrl+D (Duplicate): Select an object and press
Ctrl+Dto create an exact copy of it. This is great for creating repeating patterns or symmetrical structures.
- Ctrl+G (Group): Select multiple objects and press
Ctrl+Gto group them into a Model.
- Ctrl+U (Ungroup): Select a Model and press
Ctrl+Uto ungroup its contents.
Precise Placement
Tired of parts not aligning perfectly? Here's how to get precise:
- Increment Snapping: Use the "Move," "Rotate," and "Scale" tools with small increments to fine-tune the position, rotation, and size of your objects. You can adjust the increment values in the "Model" tab.

- Studs: Enable studs to easily measure the part size.
- Surface Alignment: Enable Align tool to move the part to the surface of another part.
Advanced Building Techniques
Take your building skills to the next level with these techniques:
- Unions: Use the "Union" tool (in the "Model" tab) to combine multiple parts into a single, complex shape. This can reduce the number of parts in your game, improving performance.
- Negate: Use the "Negate" tool (next to the "Union" tool) to create "negative" parts that can be used to cut away sections of other parts when combined with the Union tool. This allows you to create holes and intricate designs.
- Constraints: Create complex mechanical contraptions using hinges, motors and springs using constraints.

Using Plugins
Plugins can significantly speed up your development process and add new capabilities to Roblox Studio.
- Explore the Toolbox: Open the Toolbox (View Tab → Toolbox) and browse the "Plugins" category to find useful tools created by the community.
- Popular Free Plugins: Some popular free plugins include:
- Building Tools by F3X: Advanced building tools for precise construction.
- AutoScale Lite: Easily resize objects while maintaining their proportions.
- GapFill: Fills gaps between parts automatically.
- Studio Build Suite: A collection of useful building tools.
Before installing any plugin, make sure to check its reviews and ratings to ensure it's safe and reliable.
Toolbox and Output
The Toolbox and Output panels are essential resources for both beginner and advanced Roblox Studio users. The Toolbox provides a wealth of pre-made assets to accelerate your development, while the Output window helps you debug and understand what's happening in your game. Let's explore each in detail.
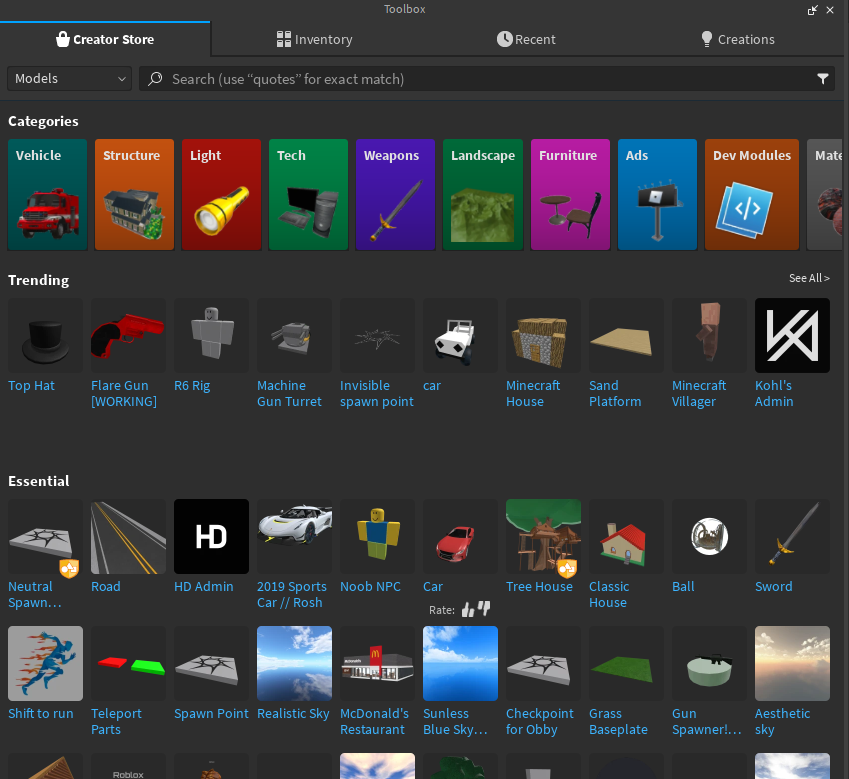
The Toolbox: Your Asset Library
The Toolbox is a treasure trove of free models, images, audio, meshes, and plugins created by Roblox and the community. It's accessible through the "Home" or "View" tab in Roblox Studio (Home → Toolbox).

Think of it as a giant library of building blocks and tools that you can use in your games.
- Models: Pre-built structures, characters, vehicles, and other objects that you can easily insert into your game. Be sure to inspect models before using them to understand how they're built and ensure they're safe (no malicious scripts).
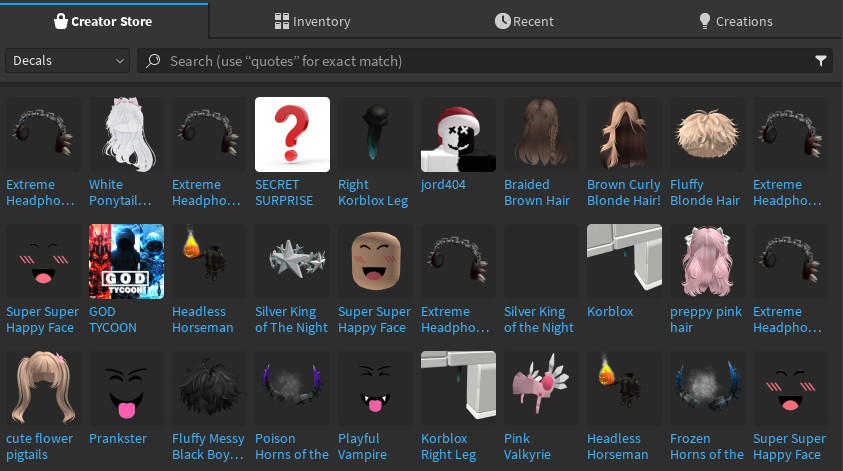
- Images: Textures, decals, and UI elements that you can use to customize the appearance of your game.
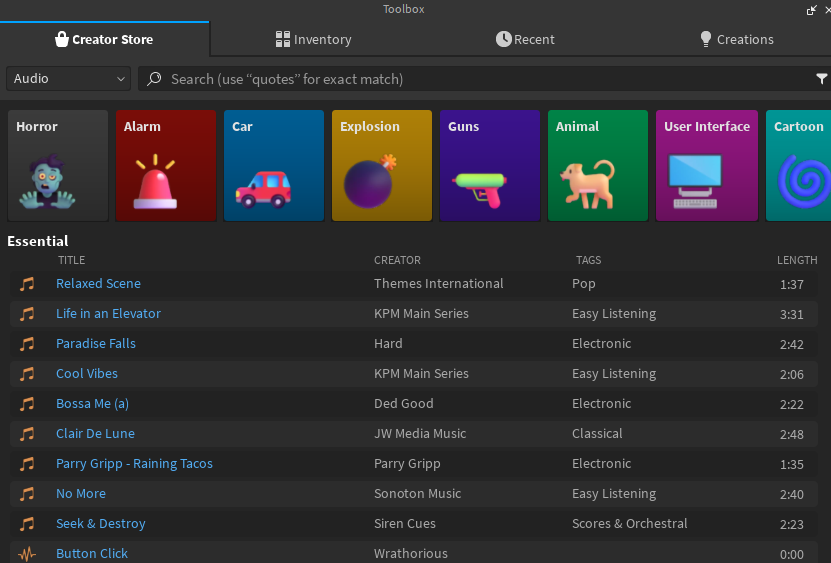
- Audio: Sound effects and music to enhance the atmosphere and gameplay.
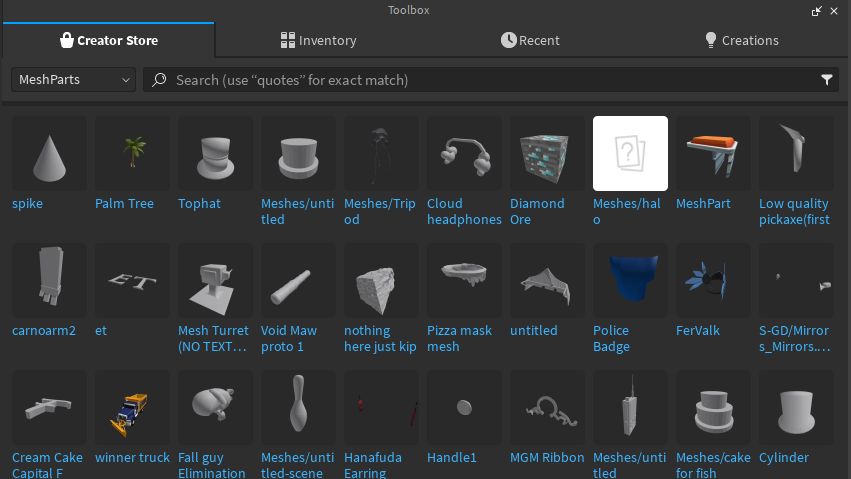
- Meshes: 3D models created in external programs (like Blender) that can be imported into Roblox Studio.
- Plugins: Tools that extend the functionality of Roblox Studio, adding new features and streamlining your workflow. We mentioned plugins in the "Tips and Tricks" section.

How to Use the Toolbox:
- Open the Toolbox: Go to the "Home" or "View" tab and click on "Toolbox."
- Browse or Search: Use the categories on the left to browse different types of assets, or use the search bar to find specific items.
- Insert into Your Game: Click on an asset to insert it into your game. It will usually appear in the workspace.
- Inspect and Customize: Select the asset in the Explorer panel and modify its properties in the Properties panel.
Important Considerations When Using the Toolbox:
- Safety: Not all assets in the Toolbox are created equal. Some may contain malicious scripts that can harm your game. Before using any asset, take a look at the creator's profile and read the reviews. If you're unsure, it's best to avoid it. You can also open the model and check any script contained in it.
- Quality: The quality of assets in the Toolbox varies greatly. Some models are well-built and optimized, while others are poorly made or outdated. Choose assets that are appropriate for your game's style and performance requirements.
- Learning: The Toolbox is a great resource for learning how other developers build things. Dissecting well-made models can teach you new techniques and inspire your own creations.
The Output Window: Your Debugging Console
The Output window is a panel in Roblox Studio that displays messages, errors, and debugging information from your scripts. It's an invaluable tool for identifying and fixing problems in your game. It's accessible through the "View" tab in Roblox Studio (View → Output).

Here is the preview of the output:

- Error Messages: When your script contains an error (e.g., a syntax error or a runtime error), the Output window will display an error message, including the line number where the error occurred. This helps you quickly locate and fix the problem.
- Print Statements: You can use the
print()function in your scripts to display messages in the Output window. This is useful for debugging and understanding the flow of your code. - Warnings: The Output window may also display warnings about potential problems in your game, such as deprecated features or inefficient code.
How to Use the Output Window:
- Open the Output Window: Go to the "View" tab and click on "Output."
- Run Your Game: Play your game in Roblox Studio (using the "Play" button in the top bar).
- Observe the Output: Watch the Output window for any messages, errors, or warnings.
- Debug Your Code: Use the information in the Output window to identify and fix problems in your scripts.
To help you simulate the experience, go to the Explorer tab and create a new Server Script in ServerScriptService , and paste the code below:
-- Example: Using print statements for debugging

local myVariable = 10

print("The value of myVariable is: " .. myVariable) -- Display the value of the variable

if myVariable > 5 then
  print("myVariable is greater than 5")
else
  print("myVariable is not greater than 5")
end

-- Simulate an error
local invalidCode = error("This is an error preview") -- This will cause a error. Check the Output panel to locate
Here is the output preview:

Scripting is really what makes your game alive, it's an essential skill but pretty hard to learn without any learning directions. If you want to learn scripting in just few months, consider subscribing to "Contributor" plan, for access to premium scripting courses, special discord channels and more!
Conclusion
Congratulations! You've made it to the end of this ultimate introduction to Roblox Studio. You've covered a lot of ground, from understanding what Roblox Studio is and how to navigate its interface to learning essential building techniques and debugging strategies. You now possess a solid foundation upon which to build your Roblox game development in just few minutes than for some takes hours...
Remember, the key to mastering Roblox Studio is practice. Don't be afraid to experiment, try new things, and make mistakes. Every project, whether big or small, is a learning opportunity. The more you build, the more comfortable you'll become with the tools and the more creative you'll be in your designs. (That's what I actually did)
The Roblox developer community is vast and supportive. Don't hesitate to seek help from other developers on the Roblox Developer Forum or through online tutorials. Consider also joining our premium plans for more resources available to help you learn and grow.
This guide is just the beginning of your Roblox development journey. As you continue to learn, explore more advanced topics like scripting, UI design, animation, and game mechanics. The possibilities are endless! (Each found in our premium tutorials and courses!)
So, fire up Roblox Studio, unleash your imagination, and start creating! We can't wait to see what amazing experiences you'll build. Happy developing!
If you want to learn more, then I recommend checking official Roblox Studio docs for more info:


Read next:

Want to see more and get notified?
Join our Discord Server
Here is the icon set I'm using: